To maintain high-quality tank water, starting with fresh water to make saltwater is crucial. A TDS meter is an excellent tool to ensure the water you add to the tank is free from unwanted elements and nutrients. The HYDROS Dual TDS Meter lets you monitor the water quality of your RODI unit, making it easier to determine when filters need replacement. Moreover, you can conveniently configure the HYDROS Control to alert you when the TDS level in the water becomes highly concentrated.
WARNING: Before adding the TDS meter to the HYDROS, it’s essential to talk about what the device is capable of and what it cannot do.
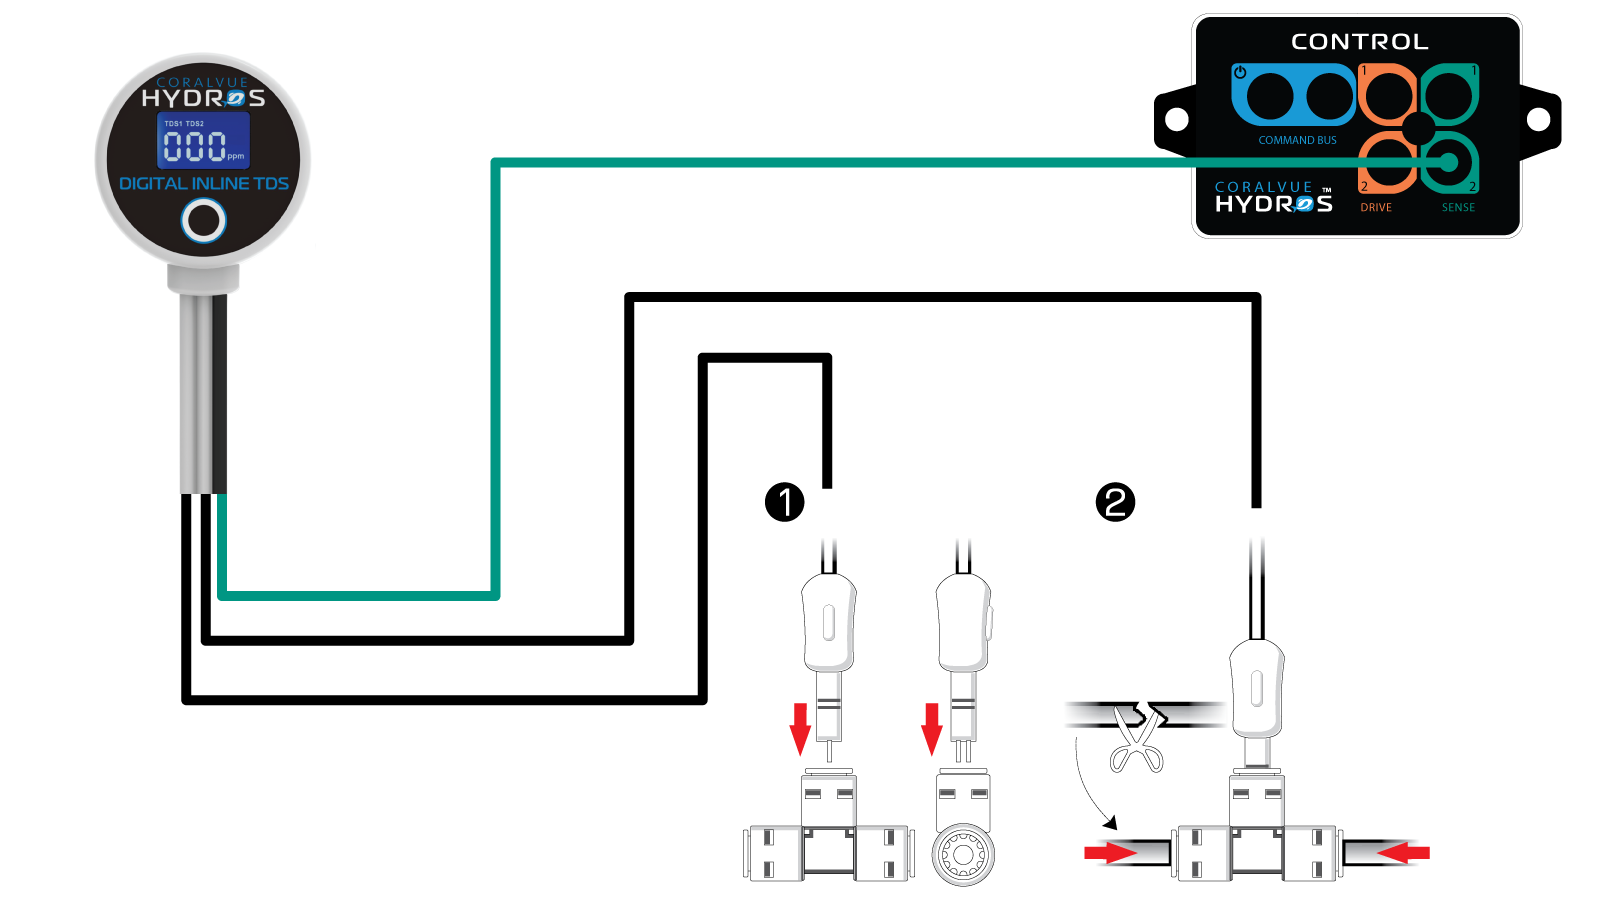
It monitors your TDS readings using two different TDS probes. Even though the probes are not labeled, Probe 1 is the cable on the left, and Probe 2 is the cable on the right.
The water quality will be automatically read for 5 minutes every hour, and this interval cannot be changed.
To take a manual reading with the TDS meter, press the center button in front of it. The meter will read for 5 minutes and then stop. It will automatically read again after an hour.
Probe 1’s readings determine all actions, notifications, and alarms. Probe 2, on the other hand, is only used for monitoring purposes. Any outputs generated can only be based on Probe 1’s readings. Additionally, it is crucial to understand that the second probe reading is solely for monitoring and cannot initiate any actions.
Once 5 minutes of constant reading have passed, HYDROS will display the previous reading. This will continue until a new reading is taken manually by pressing the TDS meter button or automatically after an hour.
Step 1: Connect the Dual TDS Meter to RODI
Connect the probes to RODI Quick Connect Tees (not included). For example, if your RODI unit only has elbows, you must replace the elbows with Quick Connect Tees to add the TDS probe.
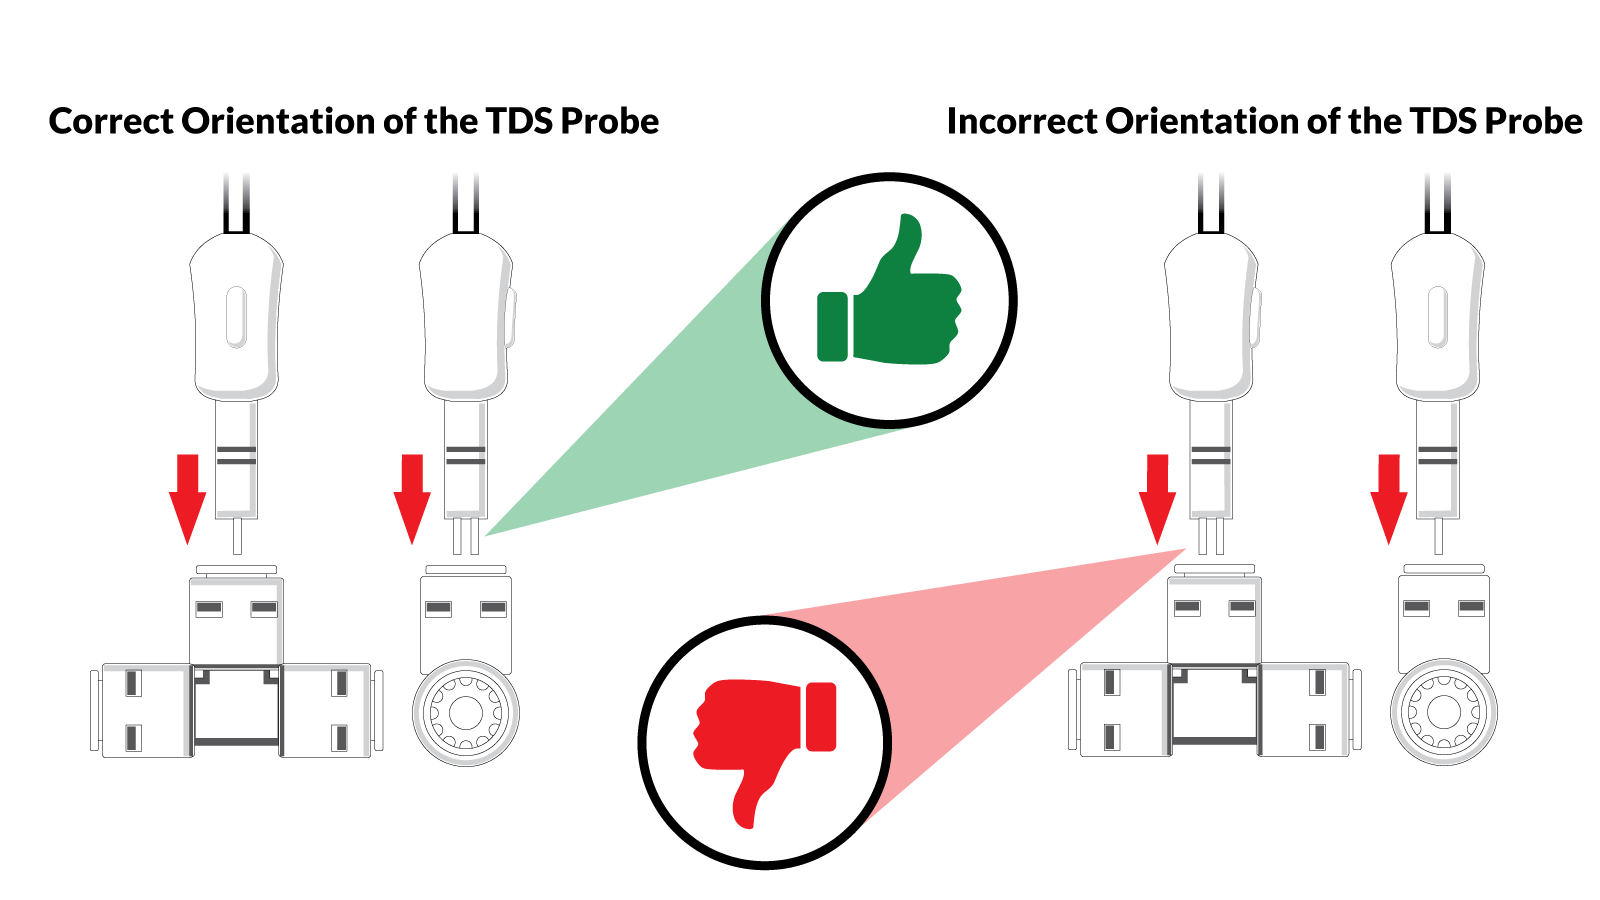
Please ensure the metal prongs are lined up PERPENDICULAR to the Tee when inserting the probe.
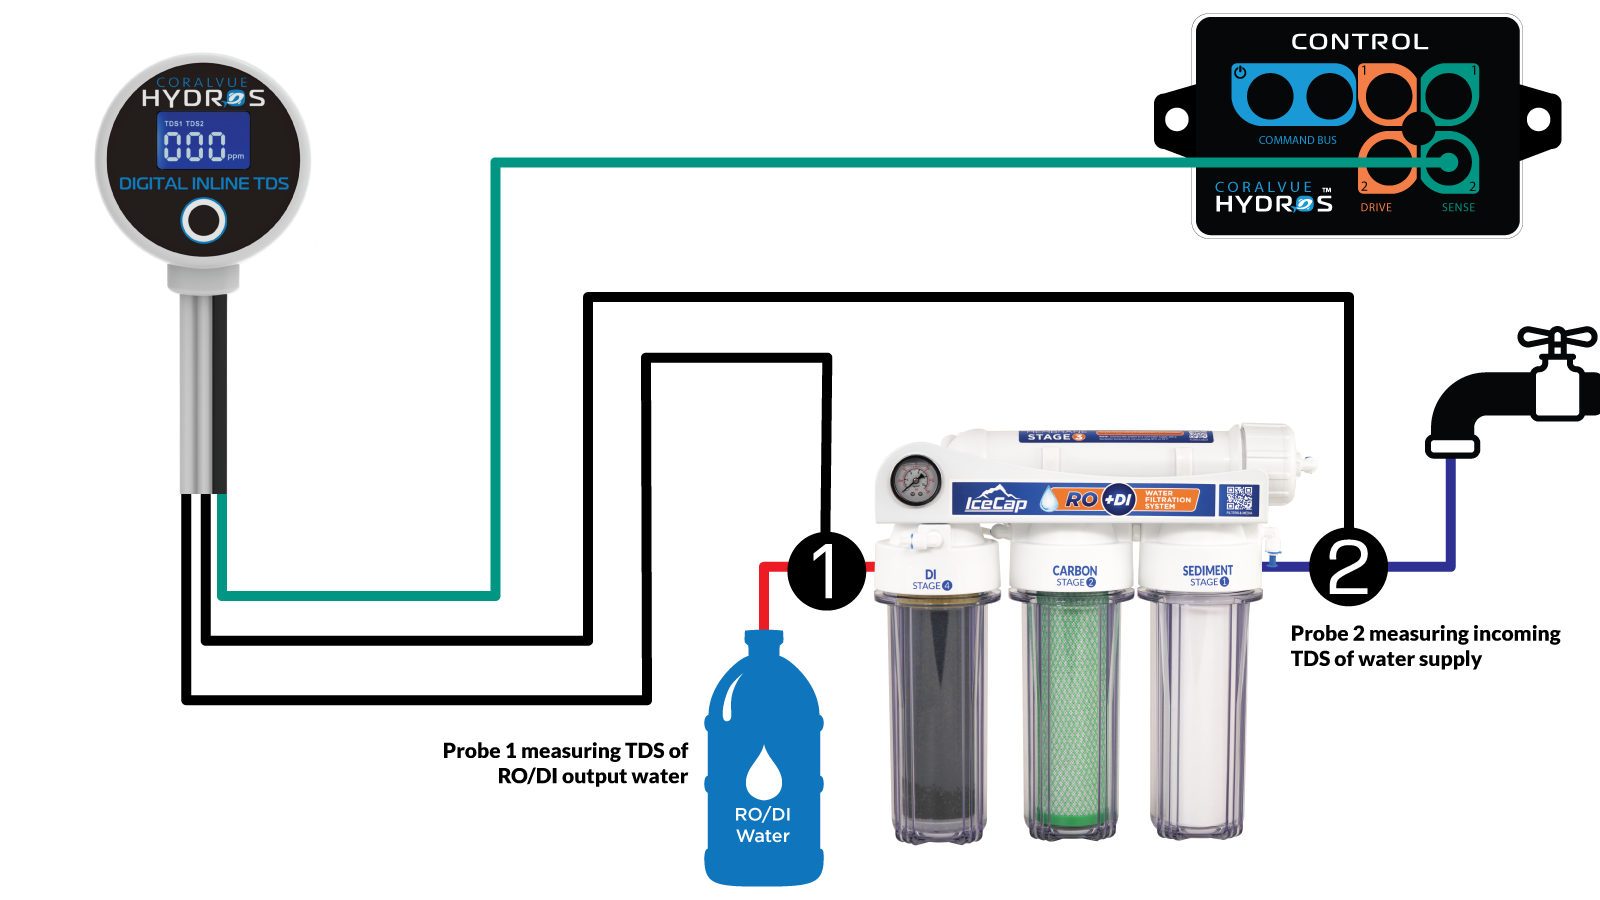
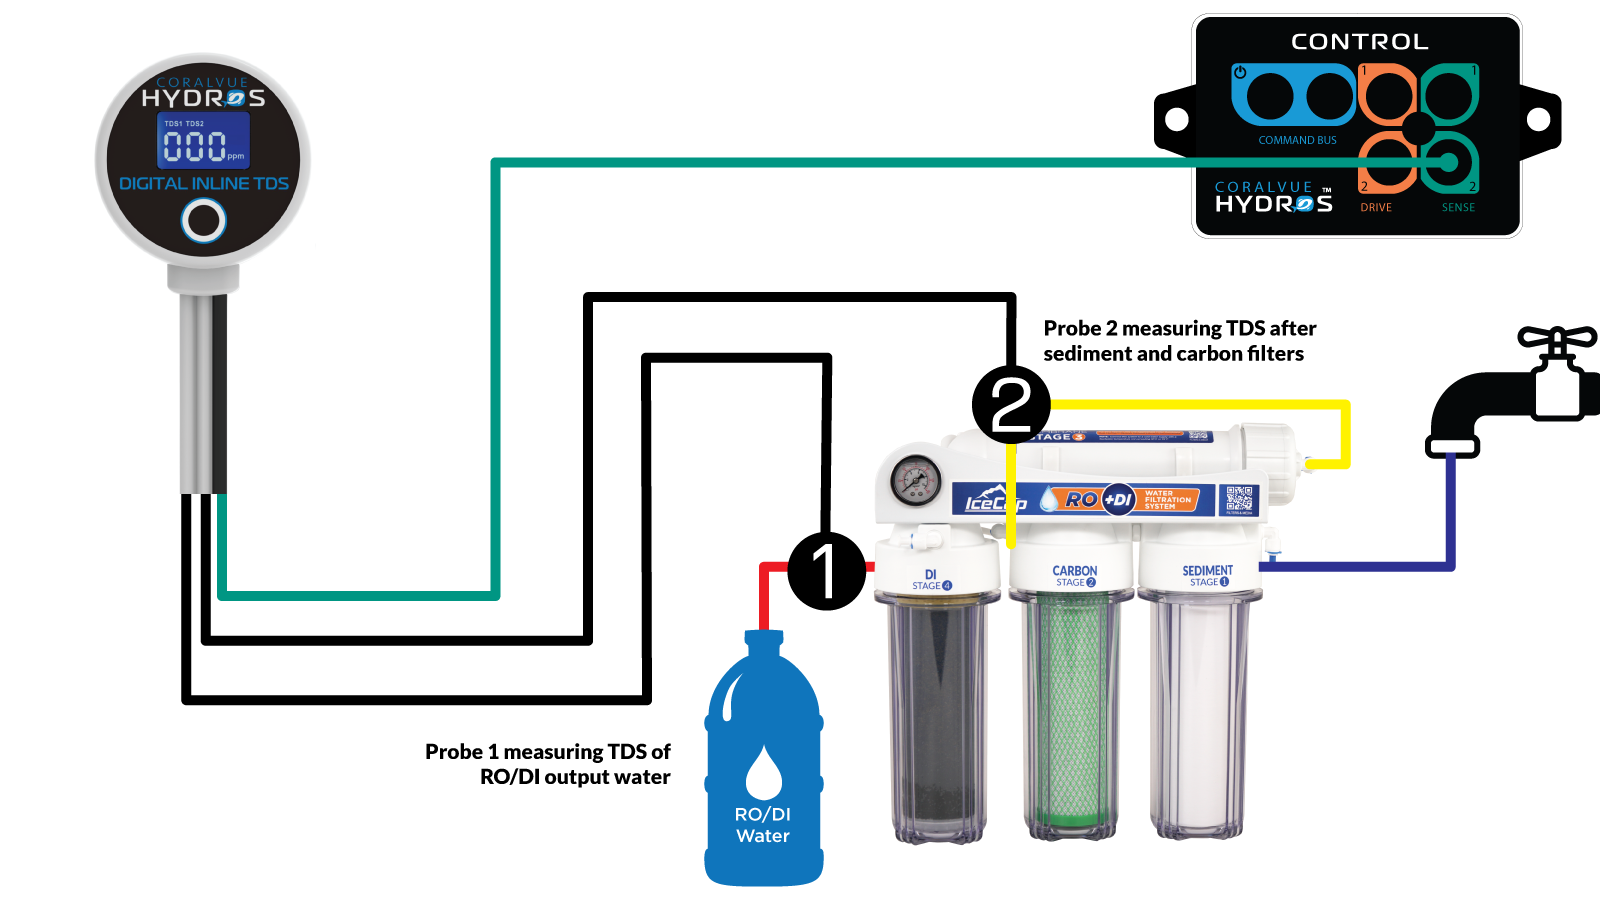
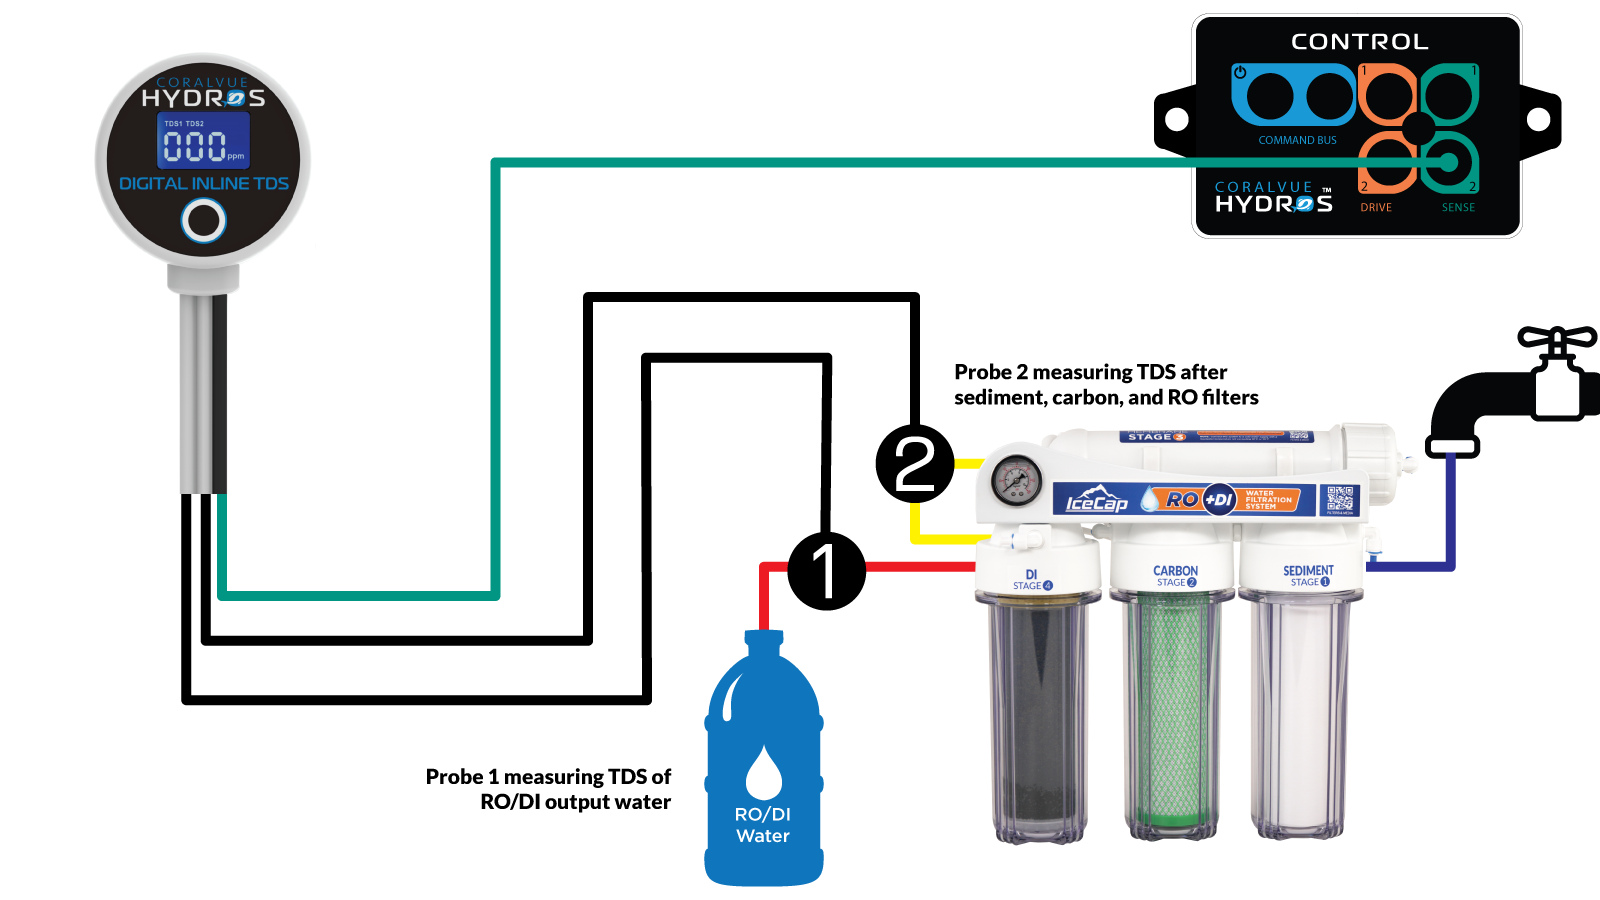
Take the left cable of the TDS meter and place the probe on the physical OUTPUT of your RODI unit. It is the output after your DI resin and will monitor the quality of your RODI water as it reaches your reservoir or aquarium.
Take the right (2nd) cable of the TDS meter and place the probe in a second location, such as:
Before your RODI unit, measure the quality of your feed/city water.
Or between your prefilters and the RO membrane, allowing you to monitor and know when to change your prefilters.
Or you could place it between your RO membrane and your DI resin, monitor the membrane’s life, and know when to replace it.
Step 2: Connect the Dual TDS Meter to the HYDROS
Connect the TDS meter to a Green Sense Port on your Control unit.
Step 3: Create the TDS Input
From the STATUS screen on your HYDROS app, tap on the three horizontal dots to the right of the INPUTS label and select “Add / Edit Input.”
Tap on the + symbol in the bottom-right corner.
Type in the name of your new INPUT and then tap “Create.”
Step 4: Configure your Dual TDS Input
Type: Select “Sense Port.”
Sense Port: Select the port number where you physically connected the TDS sensor
Sense Mode: Select “TDS.”
Safe Range: With this feature, you can establish a secure range by setting the minimum and maximum points. If the TDS Probe #1 reading exceeds this range, HYDROS will alert you if you have activated the notifications. It’s essential to note that this only applies to TDS Probe #1 readings.
Offset: If the reading is slightly off, you can use this option to make minor corrections. This applies to both Probe 1 and Probe 2 readings.
Notification: With this option, you can inform HYDROS about the timing of messages sent. You will receive alerts whenever the TDS reading goes beyond the secure range.
Is Invisible: If you choose to hide the input from the status screen, it will only become visible on pages that have “Show Invisible” selected.
Step 5: Upload the Changes
After configuring the input, tap the yellow bar at the bottom to upload your changes to the cloud and each HYDROS device.
Rename Input & Change Icon
From the STATUS screen, tap on the Input you wish to modify.
On the popup, tap on the “Gear” icon on the bottom right.
From the Input setup page, tap on the “Pencil” icon on the top left.
Type in the new name you wish
If you wish to change the default icon, please tap on “Change Icon.”