Before connecting a 12V battery to the Kraken, there are a few things that we must consider:
Yes, you can! The HYDROS Kraken is designed to be fully compatible with a 12V Sealed Lead-Acid (SLA) or AGM Battery. The Kraken will slowly and steadily charge the battery to ensure it’s ready for use when needed. The charging rate for the battery is 1 Ah (amp hour) per hour. So, for a 20 Ah (amp hour) battery, it would take approximately 20 hours to charge it from 0 to 100% fully.
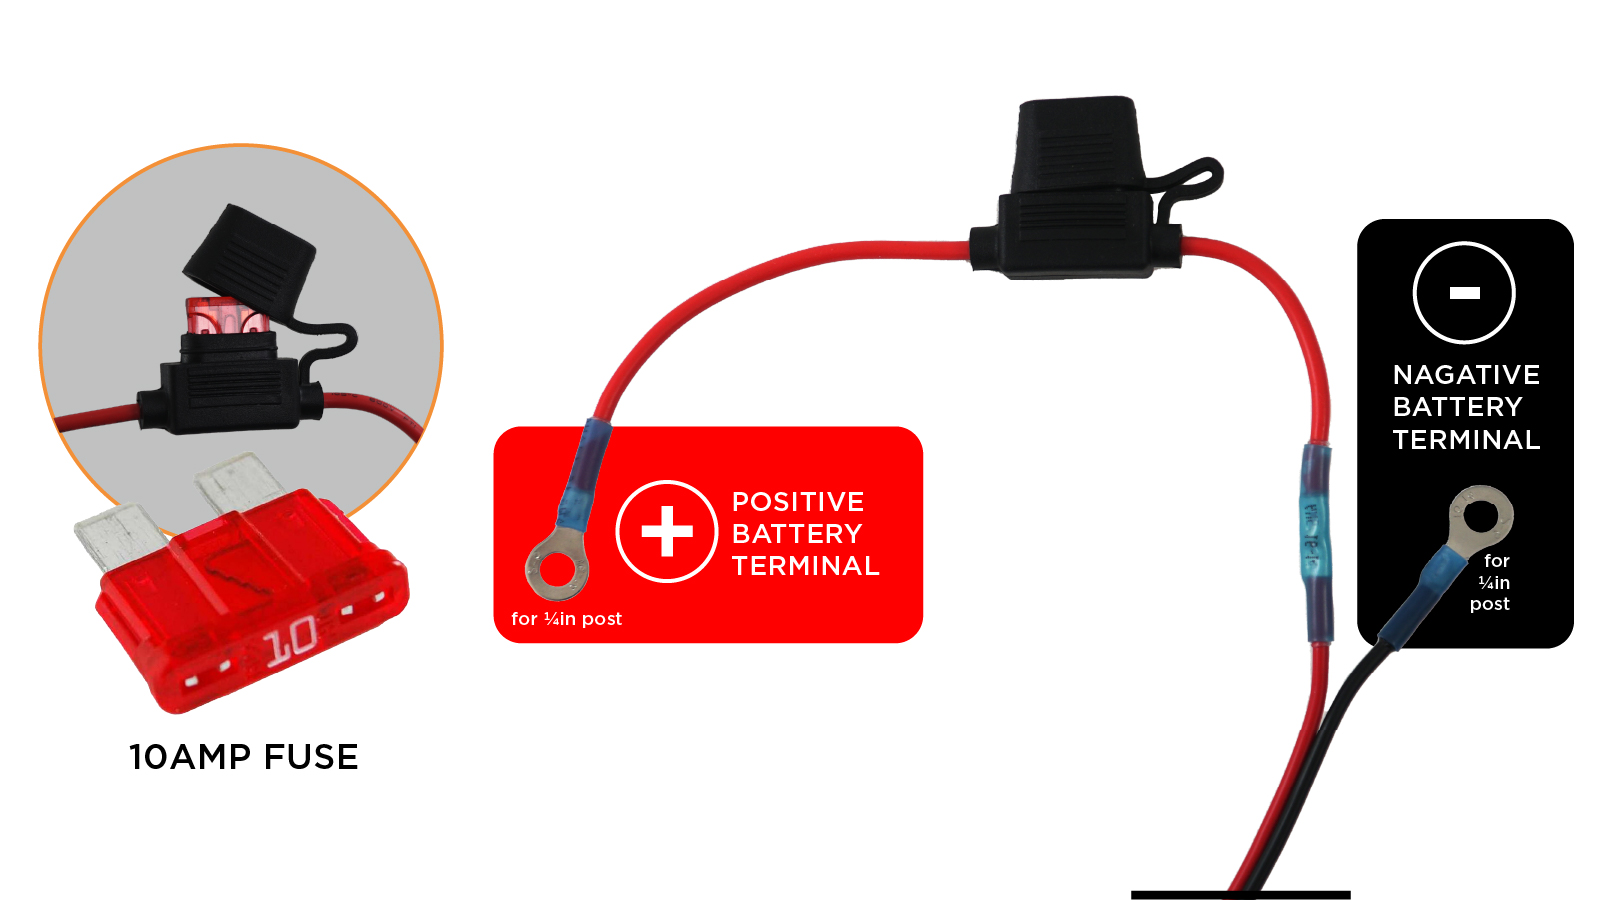
The Kraken has a maximum load of 10A when running on battery power. The Kraken battery cable comes pre-equipped with a 10A fuse.
Yes, but one MUST disable the battery charging mechanism inside the Kraken before connecting the battery. This is because lead-acid and lithium batteries have different voltage and charging algorithms and are fundamentally different in chemical compositions. The Kraken charger is specifically designed for lead-acid batteries and doesn’t have the necessary built-in safety features to prevent overcharging lithium batteries. Failing to disable the charging mechanism on the Kraken could result in battery damage, safety hazards, and potential loss of capacity or lifespan.
Now that you have read the warnings and are fully aware of which batteries are compatible with the Kraken, here is how you install it:
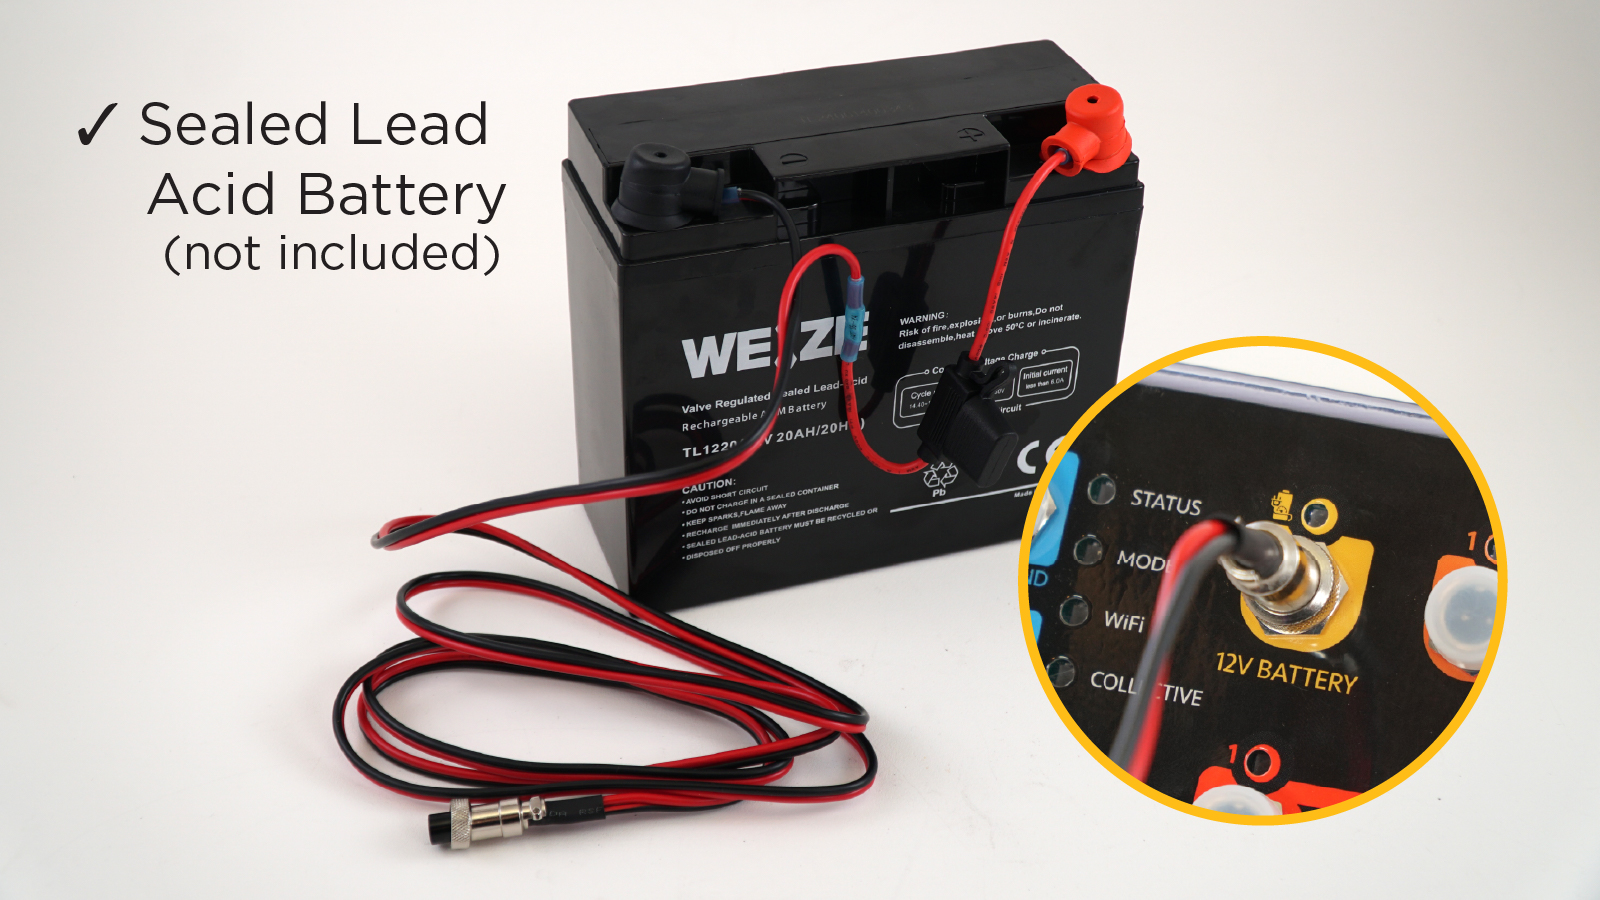
To attach the battery cable eyelids to the corresponding terminal of your 12V battery, start by removing the two screws. It is important to ensure that the terminal color matches the cable color. The red wire should be attached to the positive (+) red terminal, and the black wire to the negative (-) terminal. Once the cables are attached correctly, replace and tighten the screws.
If you are using a battery type other than Lead Acid, you must first disable the charging feature on the Kraken.


The last step is to connect the battery cable to the Yellow port on the Kraken. Remember to allow plenty of time for the battery to charge fully. The Kraken will slowly and steadily charge the battery to ensure it’s ready for use when needed. The charging rate for the battery is 1 Ah (amp hour) per hour. So, for a 20 Ah (amp hour) battery, it would take approximately 20 hours to charge it from 0 to 100%.
Configure a low-power mode to specify outputs during outages. Follow the instructions here.
