Monitoring salinity in a reef aquarium is crucial for maintaining the delicate balance necessary for the health of marine organisms. Salinity levels directly impact the osmotic regulation of marine life, influencing their overall well-being and survival ability. Regular monitoring allows aquarists to make adjustments and ensure that salinity remains within the optimal range, creating a stable and thriving environment for the reef ecosystem.
When using conductivity probes, it’s important to note that they require a break-in period of 1 to 3 weeks. This period allows the probe to adapt and remove residual oils from manufacturing. During this time, air bubbles may become trapped in the probe, resulting in gradual decreases in readings. To help with this break-in period, you can try the following:
- Soak the new probe in rubbing alcohol for 24 hours, ensuring the tip and the two vent holes on the side of the probe are fully submerged.
- After a few days of use, remove the probe and blow air through the tip and vent holes to purge any trapped air bubbles.
- Recalibrate the probe at least once a week for the first three weeks.
Once the break-in period is complete, the readings should become stable.
To add a Salinity/Conductivity probe to HYDROS, you must have the following devices:
- A configured HYDROS Controller with an open “Salinity” probe port.
Step 1: Physically Connect the Conductivity Probe
- Connect the Conductivity Probe BNC connector to your Control unit’s “Salinity” probe port (Light Blue).
Step 2: Create the Salinity Probe Input
- From the STATUS screen, tap the three horizontal dots to the right of the INPUTS label.
- Select “Add/Edit Input”
- Tap on the + symbol in the bottom-right corner
- Enter the name you wish to assign to your input and tap “Create.”
Step 3: Configure the Salinity Probe Input
- Type: Probe Port
- Probe Port: Select the port number where you physically connected the Conductivity probe
- Probe Mode: Salinity.
- Probe K: Select your conductivity probe’s “K” value. If using the probe included with the CoralVue HYDROS Salinity Kit, select K Value “10.”
TIP: Q: What is the “K” Value?
A: The K value, the cell constant, is an essential parameter associated with a conductivity probe. It represents the relationship between the distance between the probe’s two electrodes and the conductivity of the solution being measured. Accurately determining the k value makes it possible to precisely convert the measured electrical conductivity into meaningful units, providing reliable information about the solution’s composition and concentration.
Q: Where do I get the “K” Value?
A: Typically, this information is provided by the probe’s manufacturer. You can find it in the User Manual or Data Sheets. It’s also available on the manufacturer’s website or the calibration certificate. You can contact the probe manufacturer directly if you can’t find it. - Safe Range: With this feature, choose the minimum and maximum values. You will receive a notification if a reading falls outside of this range.
- Graph Value Limits: You can set a maximum and minimum value to determine the range of values shown on the Graphs view.
- Temperature Input: Select a temperature probe to help make the Salinity reading more accurate.
TIP: Q: Why is temperature critical when measuring conductivity?
A: To accurately measure the conductivity of water, it’s important to account for the temperature effect. Conductivity measurements are typically reported at a specific temperature, often 25°C (77°F), using a standardized unit known as micro Siemens per centimeter (µS/cm) or Siemens per meter (S/m). To make precise comparisons across different samples, researchers or professionals adjust the measured conductivity values to the standard temperature using a formula that considers the temperature coefficient of the solution. - Offset: If the Salinity reading is slightly off after completing a full probe calibration, use this option to make minor corrections. If the discrepancy exceeds this range, recalibrate or replace the probe.
Step 4: Upload Changes
After defining the K value, you must upload the changes at this configuration point. It will increase the accuracy of the calibration process below.
Step 5: Continue Configuration of Salinity Probe Input
- 28 PPT Calibration: See the section below for detailed instructions.
- 35 PPT Calibration: See the section below for detailed instructions.
- Notification Level: Specify the notification level you want to receive. You will receive notifications when:
- The reading is outside the safe range.
- The controller has lost connection to the sensor.
- Is Invisible: If you choose to hide the input from the status screen, it will only become visible on pages that have “Show Invisible” selected.
Step 4: Upload the Changes
After making changes, tap the yellow bar at the bottom to upload your pH probe configurations to the cloud and all HYDROS devices.
Calibrating a Salinity Probe
 [1]
[1]
Sometimes, based on the quality and age of the Conductivity probe, the HYDROS Controller might need to be calibrated to the probe’s skewed voltage reading. To calibrate, you will need the following:
- Conductivity probe
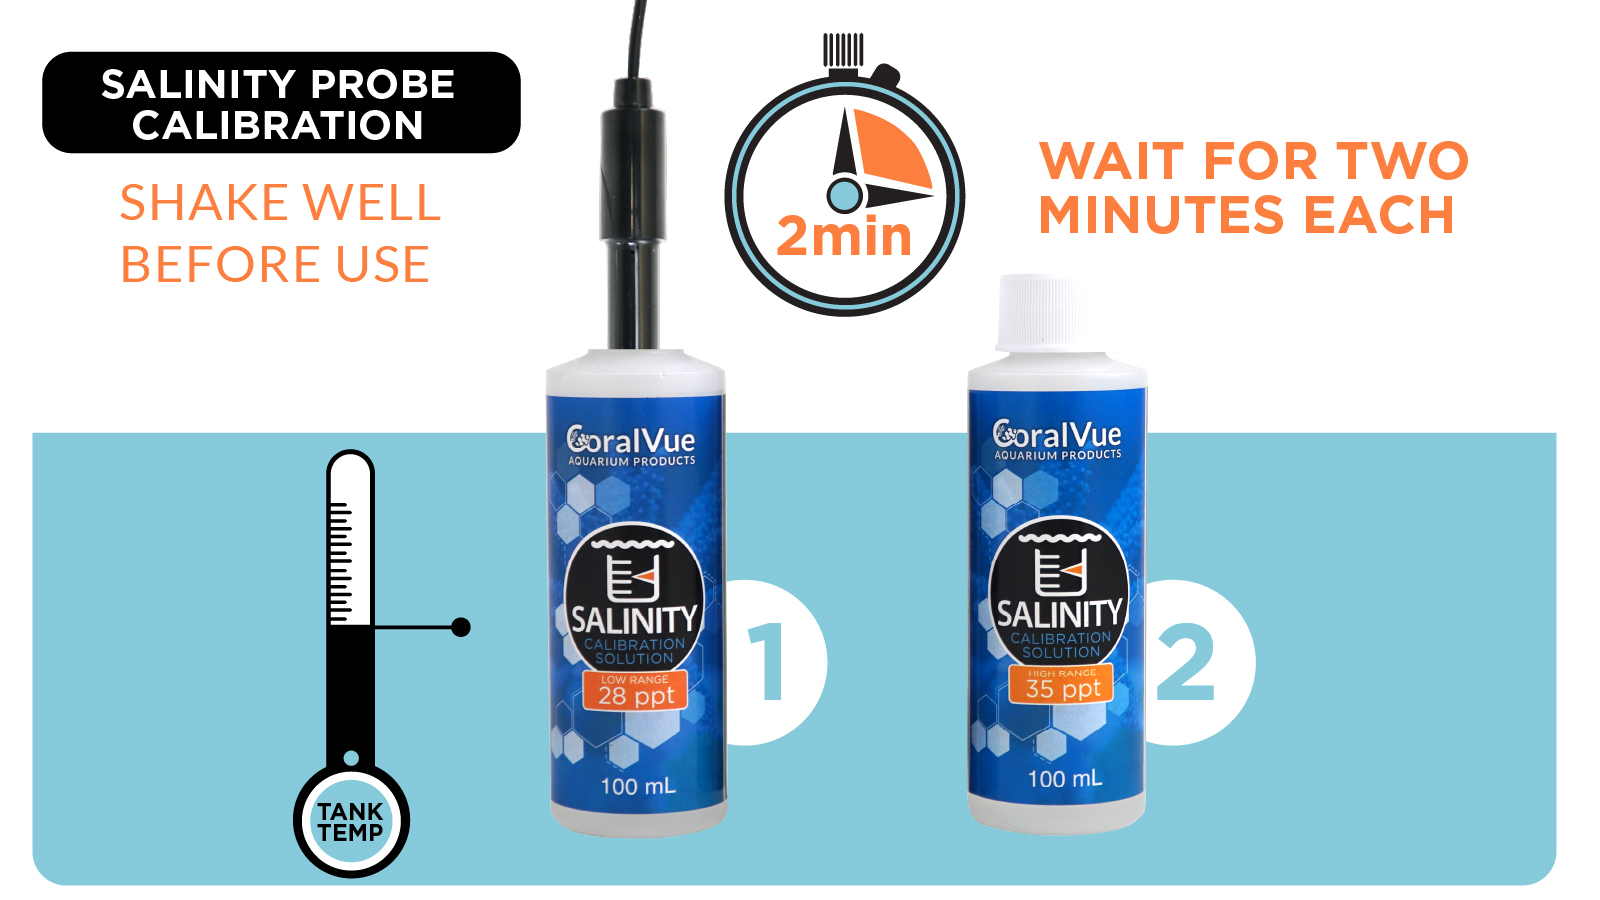
- Calibration fluids 28PPT and 35PPT at tank temperature
A: Two-point calibration is superior to single-point calibration because it accounts for non-linearities and improves accuracy. Using two reference points, typically at the minimum and maximum measurement range, the calibration curve can be more accurately modeled and interpolated, resulting in more precise measurements throughout the range. This approach provides higher confidence in the instrument’s readings, reducing potential errors and enhancing overall measurement reliability.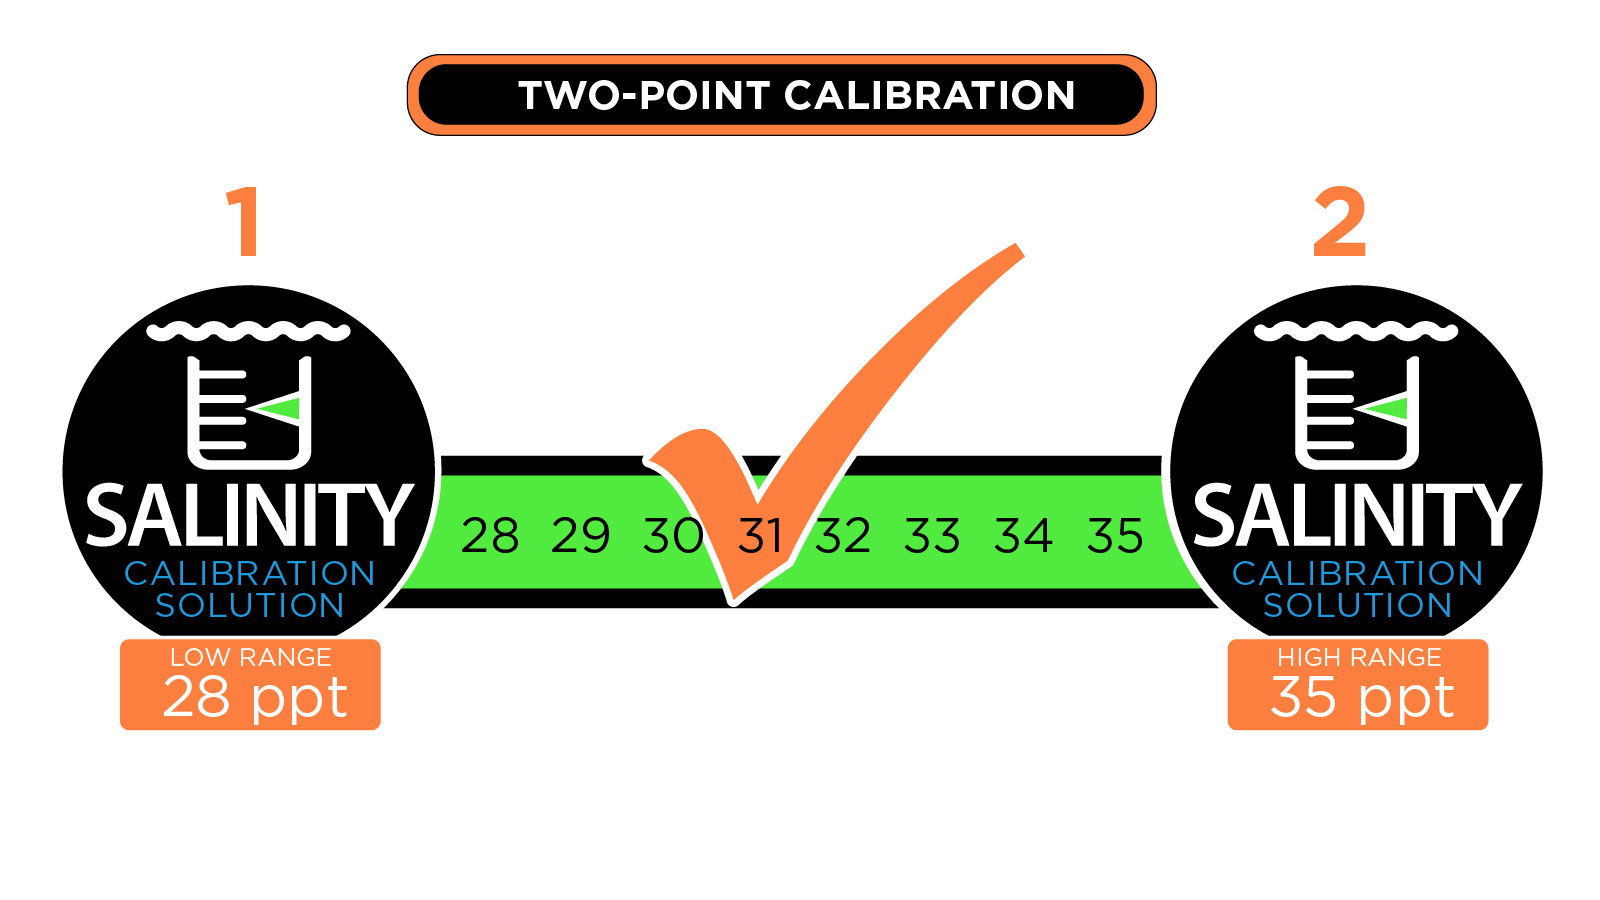 [2]
[2]
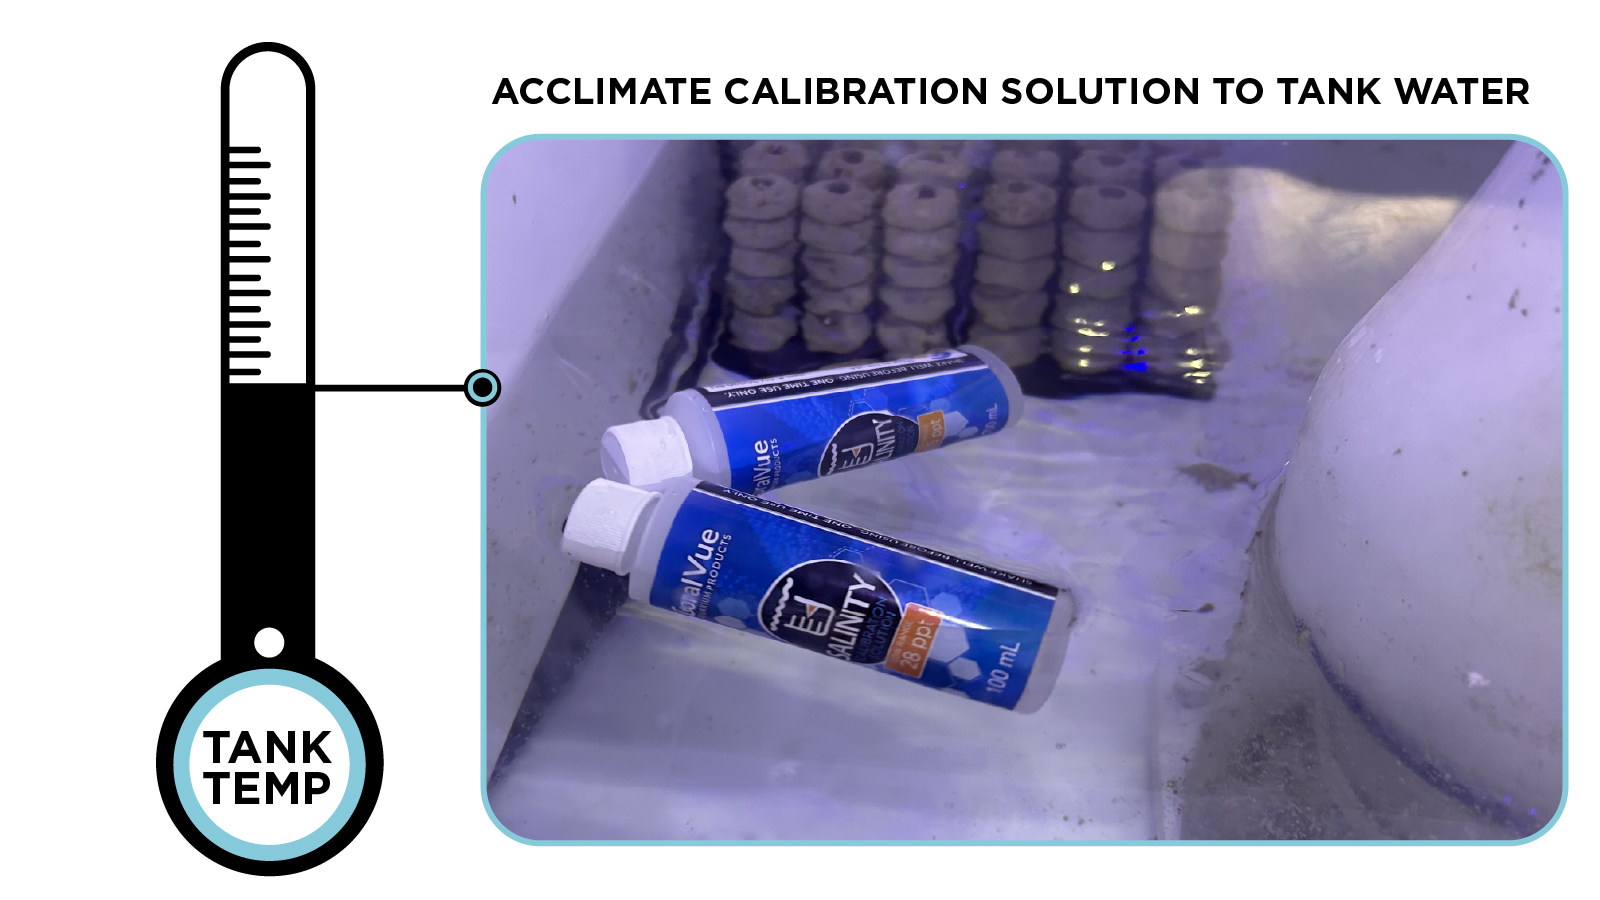
- If there is a small storage container, remove it now.
- Allow the two calibration liquid containers to sit in the tank sump for at least 10 minutes to equalize to the same temperature. As previously explained, temperature has a significant impact on conductivity readings and calibration.
 [3]
[3]

Step 1: Calibrate 35 PPT
- Remove the small storage container from the probe’s tip
- Place the probe into the 35 PPT calibration solution and swirl it around to ensure no air bubbles are trapped inside the probe’s tip.
- Tap the “Calibrate/Recalibrate” button on the app and WAIT for 2 MINUTES!
- After the 2 minutes have passed and the value has stabilized, press “Accept.”
Step 2: Calibrate 28 PPT
- Rinse the probe with RODI water and carefully dry the tip
- Place the probe into the 28 PPT calibration solution and swirl it around to ensure no air bubbles are trapped inside the probe’s tip.
- Tap the “Calibrate/Recalibrate” button on the app and WAIT for 2 MINUTES!
- After the 2 minutes have passed and the value has stabilized, press “Accept.”
Rename Input & Change Icon
- From the STATUS screen, tap on the Input you wish to modify.
- On the popup, tap on the “Gear” icon on the bottom right.
- From the Input setup page, tap on the “Pencil” icon on the top left.
- Type in the new name you wish
- If you wish to change the default icon, please tap on “Change Icon.”